
I know photography equipment is an investment, and I want to help you protect it for years. I rely on simple, repeatable steps so my gear keeps performing without extra fuss.
As a pro, I learned you don’t need to baby every piece to keep a lens in top shape. With a solid routine, you can remove dust and grime and avoid costly repairs to your camera bodies and gear.
A simple habit that saved my lenses over time
I’ll be honest—there was a time I didn’t take lens care seriously. I thought a quick wipe on my shirt was “good enough,” until I started noticing loss of contrast and small scratches showing up in my photos. That was the moment I realized that poor cleaning habits can quietly damage your gear over time, even if everything looks fine at first glance.
From my experience, the biggest difference came not from expensive tools, but from consistency. I started doing quick checks before and after shoots, and I stopped cleaning unnecessarily. Many people think cleaning more often is better, but I’ve learned that cleaning only when needed—and doing it properly—is what really preserves the lens.
I learned the hard way that rushing a cleaning process can cause more damage than the dirt itself.
If I could give one practical tip, it would be this: always remove dust first before touching the glass. It sounds basic, but skipping that step is one of the easiest ways to create micro-scratches. A simple blower and a calm, step-by-step routine have helped me keep my lenses in good condition without stress or extra cost.
In the end, maintaining your equipment isn’t about perfection—it’s about building small, reliable habits that protect your investment and keep your results consistent over time.
My goal is to show you how to clean camera lenses safely and maintain them with minimal time and expense. I will guide you through essential checks and easy habits that protect your equipment and help you shoot with confidence.
By following a proven maintenance routine, you’ll save money and keep your lens glass clear for years of reliable use.
Key Takeaways
- Simple routines protect expensive gear and extend its life.
- Short, regular checks remove dust before it causes harm.
- Proper tools and steps reduce repair needs and save time.
- I show safe methods so you can handle lens care with confidence.
- Consistent maintenance keeps your camera lenses performing reliably.
Why Proper Lens Maintenance Matters
A well-kept camera lens directly affects how light hits your sensor and the clarity of every shot.
Over time, fingerprints, smudges, and dust settle on glass elements. These issues reduce contrast and soften details. Even indoor air carries grime that lowers final image quality.
I’ve seen neglect cause permanent wear to delicate coatings. That kind of damage can lower the long-term performance of your lens and make repairs costly.
Regular care keeps equipment reliable so you can shoot without hazy obstructions. Small habits prevent big problems and preserve image quality for years.
Take a few minutes routinely to inspect and address minor issues. It’s the easiest way to protect your investment and maintain consistent results.
| Issue | Visible Effect | Likely Cause | Quick Fix |
|---|---|---|---|
| Smudges | Soft focus, streaks | Fingerprints or oils | Gentle wipe with proper solution |
| Dust | Specks, lower contrast | Environmental exposure | Blow and brush off elements |
| Coating wear | Flare, reduced clarity | Neglected maintenance over time | Professional service or replacement |
| Mold | Cloudy, permanent spots | Moisture trapped in storage | Humidity control and pro cleaning |
- Inspect before each shoot.
- Address smudges and dust right away.
- Store gear in dry, protected cases.
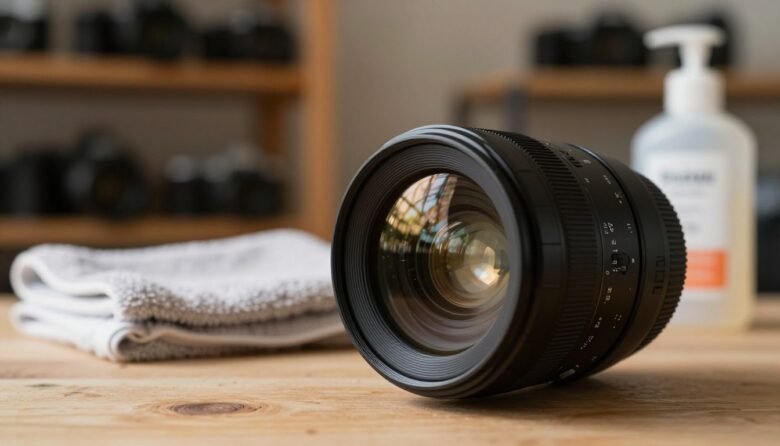
Essential Tools to Clean Camera Lenses Safely
A compact kit saves time and prevents small issues from growing. I keep a set of trusted items ready so routine maintenance stays quick and effective.
Recommended Camera Store Supplies
Rocket blower: I highly recommend a rocket blower to blast away dust and grit from the lens surface without touching glass.
Soft-bristled brush: A quality brush removes particles from the edge of the barrel and keeps dirt from migrating inward.
Microfiber cloths and Zeiss wipes: I use a dedicated microfiber cloth for buffing and Zeiss pre-moistened wipes for stubborn smudges. They’re gentle and reliable for lens cleaning solution needs.
Household Alternatives
If you lack pro supplies, a clean makeup brush can act as a soft brush to lift dust. I avoid using the same cloth I use on my phone to prevent transferring oils or fingerprints.
“Having the right tools is essential for maintaining clear video and image quality.”
- Keep a simple kit with a blower, brush, microfiber cloths, and a small bottle of lens cleaning solution.
- Label cloths so you never mix lens cloths with other household cloths.
Preparing Your Gear for a Deep Clean
Before you get hands-on, set up a tidy workspace so maintenance stays quick and stress-free.
Power down and unplug every body and accessory. Removing batteries and memory cards prevents accidental power-on and keeps contacts safe.
I work on a flat, stable surface with good light. That reduces the chance of drops and makes it easier to spot dust or dirt on the barrel.
If I’ve been shooting at the beach, I lightly dampen a microfiber cloth with fresh water to lift salt before any rubbing. This prevents grit from scratching glass.
- Store my cleaning supplies in a Ziploc to keep them dust-free until use.
- Work slowly and avoid pressing near the mount so you don’t push debris into the body.
- Lay out any small tools in order so each step flows and nothing gets misplaced.
Preparing your workspace is the best way to protect the lens and related gear during deeper maintenance. Follow these steps and you’ll make the actual cleaning process safer and faster.
Removing Loose Dust and Debris
Begin with a gentle sweep to lift dust and grit so you don’t drag particles across glass later.
Using Air Blowers and Brushes
I start with a rocket blower aimed so the camera lens faces downward. That way debris falls away instead of settling back on the surface.
Next, I use a soft-bristled brush to whisk remaining particles from the barrel and mount. A few light passes reveal stubborn spots or fingerprints that need more attention.

I avoid blowing with my mouth because saliva can leave tiny spots and add work. When I’m sure loose dust and dirt are gone, I reach for a microfiber cloth.
- I only use the cloth after all debris is removed to prevent scratching.
- A quick circular motion with the brush cleans crevices around the mount and keeps particles from entering the body.
- Finish with one last air blast to clear any settled grit before moving to wet cleaning.
These simple steps protect glass and cut the risk of long-term damage to your lens and gear.
Techniques for Wiping Glass Elements
When dealing with glass elements, one gentle pass at a time keeps your images sharp.
Applying Cleaning Solutions
Never spray solution onto the glass. I put a few drops of lens cleaning solution on a microfiber cloth first. This prevents liquid from reaching the mount or sensor.
I use a soft cloth, not tissues that leave fibers, and reserve a second cloth for drying. For light dust, an air blower and gentle brush remove particles before any liquid touches the surface.
Circular Motion Methods
I wipe with a gentle circular motion, starting at the center and moving outward. This pushes dust and dirt toward the edge and off the element.
Keep strokes light and steady. Reapply a small amount of solution to the cloth if you need a second pass.
Handling Stubborn Smudges
For greasy spots or fingerprints, I use pre-moistened tissues made for optics and repeat two or three times until clear.
“Avoid breathing on your lens; acidic breath can wear coatings.”
Once the grime is gone, I buff with a dry microfiber cloth to restore surface clarity and maintain image quality.
Common Mistakes to Avoid During Cleaning
A few wrong moves while tending gear can cause lasting harm to your optics.
Do not use tap water. Minerals leave residue and can cause micro-scratches on the glass. I only use distilled water or a purpose-made solution when needed.
Avoid paper towels and household tissues. These fibers are abrasive and harm coatings. I always reach for a microfiber cloth or optical tissue instead.
Don’t blow with your mouth. Spit droplets and fine particles can land on internal elements or the sensor. Use an air blower or a soft brush to lift dust and debris.
Never press hard. Aggressive scrubbing risks scratches and damage to the element surface. Gentle, controlled strokes work best for smudges and spots.
Power off before you start. Cleaning a live sensor or hot electrical contacts can lead to errors or short circuits. Remove batteries and memory cards first.
Choose the right cloth. A shirt or random rag transfers oils and grime. I keep labeled cloths just for optics to avoid cross-contamination.

| Mistake | Risk | Quick Fix |
|---|---|---|
| Using tap water | Residue, micro-scratches | Use distilled water or lens solution |
| Paper towels / tissues | Coating abrasion | Use microfiber or optical tissues |
| Blowing with mouth | Moisture and debris on sensor | Use a blower or soft brush |
| Pressing hard | Permanent scratches | Light, circular strokes |
- Inspect before each session to catch dust or grime early.
- Keep a small kit with a blower and microfiber cloths on hand.
- If unsure, seek professional service rather than risking costly damage.
Best Practices for Long-Term Lens Care
A steady inspection routine keeps small problems from turning into costly repairs.
Routine Inspection Schedules
I inspect my lens every three to four weeks to catch dust or grime early. Short checks save time and stop tiny issues from growing into damage.
I also check caps and cases so they don’t re-contaminate my gear. Keeping covers in good shape is an easy way to protect elements between shoots.
What I carry in my bag:
- A dedicated kit with a blower, microfiber cloth, and a trusted cleaning solution.
- An extra cloth for mounts and contacts to prevent communication errors with the sensor.
- A spare filter if I’m working in heavy dust; filters can protect the front element.
“A short routine beats a long scramble when things go wrong.”
Follow these care steps and your camera lenses will keep delivering high quality results. Regular attention saves money and keeps your equipment ready when inspiration strikes.
Final Thoughts on Keeping Your Equipment Pristine
Small, steady habits make a big difference in how my gear performs. I spend a little time each month to check the camera and lens. That short routine keeps my equipment reliable and ready for important shoots.
Regular cleaning removes dust and stops tiny issues from growing. I use a soft cloth and a gentle solution when needed. This saves money and reduces the chance of costly repairs.
When I maintain my kit, image quality stays high and my workflow stays smooth. Do a monthly check, use the right tools, and be patient—your lenses will thank you with better results every time.
FAQ
How often should I inspect my prime lenses?
I check my gear visually before and after each shoot and do a more thorough inspection every month. That includes looking for dust, fingerprints, and any signs of fungus or damage to the glass and mount. Keeping a regular schedule prevents small issues from becoming costly repairs.
What basic items should I have in a recommended camera store supplies kit?
I keep a small kit with a Giottos Rocket blower, a quality microfiber cloth, a lens brush, and a few pre-moistened Zeiss lens wipes. I also carry a bottle of optical-grade cleaning solution and a set of lens tissues for tougher grime. These store-bought tools are designed for optical coatings and reduce risk of scratches.
Can household alternatives work if I don’t have a proper kit?
Yes—when I’m in a pinch I use a clean, lint-free cotton T-shirt, distilled water mixed sparingly with isopropyl alcohol (70% max), and a soft paintbrush for loose dust. I avoid paper towels, regular tap water, or household cleaners as they can leave residues or damage coatings.
How do I prepare my gear before a deep clean?
I work in a clean, well-lit area and remove filters, lens caps, and any accessories first. I mount the lens on the camera body to block the rear element from sudden jolts, or I place it on a soft surface. I turn off the camera to prevent static and keep small parts organized on a towel.
What’s the safest way to remove loose dust and debris?
I always start with an air blower—never compressed air—to dislodge particles. After that, I use a soft-bristled brush to sweep away remaining dust, using gentle strokes from the center outward. This prevents dragging grit across the glass and reduces the chance of scratches.
How should I use an air blower and brush without causing damage?
I hold the lens downward so loose particles fall away, then apply short bursts from a Giottos-style blower at an angle. For brushes, I use a camel-hair or anti-static brush with light pressure. I avoid touching the glass with fingers and never blow with my mouth, which introduces moisture and oils.
When and how do I apply cleaning solutions to glass elements?
I only use a few drops of optical-grade solution on a microfiber or lens tissue—never directly on the glass. I work from the center outward in one pass, then finish with a dry cloth to remove residue. I choose solutions from trusted brands like Zeiss or PEC-PAD to protect coatings.
What circular motion method should I use for wiping lenses?
I prefer a single outward spiral, starting at the center and moving toward the edge in one smooth motion. This minimizes repeated strokes over the same spot. If I need to repeat, I use a fresh section of the cloth to avoid reintroducing grime.
How do I handle stubborn smudges or fingerprints?
I dampen a microfiber with a small amount of optical cleaner and gently blot the spot before wiping. For persistent oils I use a PEC-PAD or Zeiss tissue with light pressure. If marks remain, I repeat the dilute-clean-rinse sequence—never increase force, which can wear coatings.
What common mistakes should I avoid during lens maintenance?
I avoid using household glass cleaners, paper products, or rough fabrics. I never rub abrasive particles across the glass, and I don’t spray liquids directly on elements. I also avoid frequent unnecessary cleaning—over-cleaning increases wear.
How can I protect my glass elements long term?
I use high-quality front and rear caps, store lenses in a dry case with silica gel packs, and attach clear UV or protective filters when shooting in harsh environments. I also keep lenses capped during transport and inspect them regularly to catch issues early.
What routine inspection schedule do you recommend?
I visually inspect before and after every session, perform a light wipe weekly if I use the lens often, and do a detailed cleaning and mount check monthly. For gear exposed to dust, salt, or humidity I increase frequency and dry the items thoroughly after each use.

Noah Sterling is a prime lens photographer and visual storyteller dedicated to capturing sharp, intentional imagery through fixed focal lengths. He shares practical insights on composition, depth, and lens choice, helping photographers master simplicity and achieve powerful, professional results.