I believe the 50mm is the most essential tool for any photographer who wants to master composition with a single, versatile piece of glass.
What I Learned After Years of Shooting with a 50mm
I’ll be honest — when I first bought a 50mm lens, I expected it to magically improve my photos overnight. It didn’t. In fact, my first few shoots were frustrating because I realized something important: the lens doesn’t do the work, you do. What it actually gave me was something more valuable — a forced discipline. I had to move, rethink angles, and pay attention to light in ways I had ignored before.
Over time, that limitation became my biggest advantage. I started understanding how composition really works, not because the gear was better, but because I was finally paying attention. That’s something no spec sheet or review can teach you. If there’s one piece of advice I’d give, it’s this: don’t rush to upgrade or chase “perfect” gear. Use what you have, test it in real situations, and learn how it behaves in your hands.
“The moment I stopped blaming my gear was the moment my photos actually improved.”
So if you’re choosing your first 50mm, think less about hype and more about how often you’ll actually use it. A lens that fits your routine — your walks, your trips, your everyday life — will always teach you more than the most expensive option sitting unused in your bag. Consistency beats specifications every time.
In my testing, including trials on a Sony A7rII used by the team at Phillipreeve.net, this focal length kept proving its value. I wrote a long review after comparing many options and found the results clear.
Whether you shoot digital or film, this setup gives a natural view close to the human eye. It helps you learn light and framing faster than a complex zoom.
Every shooter should own at least one of these lenses for daily use. I spent years testing to make honest recommendations and I include links to help you choose gear that fits your style.
My goal is simple: show why this prime lens makes a great first step toward better photography.
Key Takeaways
- The fifty-millimeter focal length offers a natural perspective for learning composition.
- I tested many options on the Sony A7rII and shared detailed review notes.
- One compact lens balances performance and portability for daily shooting.
- Using a single focal length speeds up learning light and framing.
- I include links to comparisons to help you pick gear that fits your needs.
Understanding the Versatility of the Standard Focal Length
A standard focal length gives a view that feels natural to most people and photographers alike.
I often use this length when I want a single lens to do many jobs. It handles environmental portraits, street shots, and simple architecture without fuss.
On the street, it forces me to move and find better angles. That practice improves composition fast.
For portraits it avoids the odd distortion of wider glass and the heavy compression of telephoto options. The result is pleasing images of people with true proportions.
- Versatile in use: portraits, streets, and interiors.
- Reliable on modern cameras: sharp images and consistent quality.
- Practical: many days of shooting prove its dependability.
| Use | Strength | Typical Result |
|---|---|---|
| Street | Natural field view | Candid images of people |
| Portraits | Flattering rendering | True proportions, sharp eyes |
| Architecture | Balanced perspective | Clear lines, minimal distortion |
Key Factors to Consider Before Buying Your First Prime Lens
Decide which technical traits will shape your work before you buy. I advise listing what matters most: sharpness, contrast, aperture, and size. This makes comparisons faster and clearer.
Performance Aspects That Matter
Sharpness across the frame and contrast define how usable images are for large prints or tight crops. I look for even rendering in the center and corners.
Autofocus speed is vital for event work, while manual control can suit studio or landscape shoots. The Voigtländer 50mm f/2 APO-Lanthar stands out for overall performance in wide field work but lacks autofocus.
Application Specifics for Different Photographers
A portrait photographer may prefer smooth bokeh and flattering falloff over absolute corner-to-corner sharpness.
Landscape shooters need a tool that performs uniformly across the field. Think about whether you want a fast aperture for low light or a compact length for travel.
- Tip: Check focal length interaction with your sensor before you buy.
- Read technical tests and follow affiliate links in later sections for deeper data.
| Use Case | Priority | Trade-off |
|---|---|---|
| Portraits | Bokeh, skin rendering | May sacrifice edge sharpness |
| Landscapes | Uniform sharpness | Often larger and heavier |
| Events | Autofocus and speed | Less manual control finesse |
Evaluating Your Budget and Long Term Value
I make buying decisions by asking how a piece of gear will serve me over years, not just days. Think long term and you avoid repeated replacements that cost more money in the end.
Spend a bit more on solid build quality when it improves performance and reduces repairs. A sturdy lens often holds resale value and gives consistent image results.
Buying used from reputable sources can cut the initial price while keeping professional results. I often find gently used glass that feels new and works reliably.
Weight and size matter too. A heavy, expensive option may not suit a casual photographer who shoots for fun.
View good glass as an investment: it may outlast several camera bodies and still fetch value later.
- Balance cost with sharpness, build, and how you use light.
- Check links and terms before you buy used.
| Factor | Short-Term | Long-Term | Notes |
|---|---|---|---|
| Price | Lower cost | Resale holds value | Used options can bridge both |
| Build Quality | Lighter, cheaper | Durable, fewer repairs | Better results over years |
| Performance | Immediate sharpness | Consistent image quality | Impacts professional results |
Balancing Size and Weight for Your Shooting Style
Carrying gear all day taught me that weight and size shape what I actually shoot.
Choose comfort first if you plan long hikes or full-day street walks. A light lens keeps you shooting when you would otherwise leave the camera at home.
Heavy, pro-grade options offer excellent build quality and optical performance. Yet their weight can tire your hand and throw off camera balance during long sessions.
For discreet street work I prefer compact lenses. They let me stay unobtrusive and still capture high quality images.
“A lens you use is worth more than a heavier tool you don’t.”
Always check filter thread size and overall dimensions. Those small specs decide if gear fits your bag or needs new filters.
- Prioritize a lightweight option to carry gear daily.
- If you are a pro, weigh the trade-off between durability and extra weight.
- Use the included links to see exact weight and size before you buy.
| Factor | Lightweight | Professional |
|---|---|---|
| Weight | Easy to carry | Usually heavier |
| Size | Compact, discreet | Larger, robust |
| Balance on camera | Better for long use | May need support |
Determining the Right Aperture for Your Needs
I choose aperture to shape mood, depth, and how much light I let in. The setting you pick controls subject separation and background blur when shooting wide open.
For portraits, I often use f/1.4 to isolate the subject and get creamy bokeh even in dim conditions.
If low-light performance is top priority, an f/1.2 option gives extra exposure latitude, though it can add size and cost.
Try your gear at several stops. Stopping down improves corner sharpness but reduces background blur. Test to see where image quality and bokeh meet your needs.
- Tip: a versatile aperture range helps you adapt from bright daylight to indoor work.
- Always check bokeh quality at the widest setting; it often separates pro-caliber models from consumer ones.
- Use the affiliate links to compare how specific apertures render in real shots.
| Aperture | Use Case | Background Blur |
|---|---|---|
| f/1.2 | Extreme low light, tight isolation | Very strong, creamy |
| f/1.4 | Portraits, low light | Strong, pleasing bokeh |
| f/2.8–f/4 | General work, landscapes | Moderate to low |
Choosing Between Autofocus and Manual Focus Lenses
Choosing between autofocus and manual focus often comes down to whether you value speed or the tactile pleasure of control.
Autofocus gives reliable tracking for events, weddings, and fast-moving subjects. I use it when I need repeatable results and less missed frames. Modern camera systems pair well with quick, accurate AF and steady results under pressure.
Manual focus rewards patience. A smooth focus ring and precise throw make framing feel like craft. I find this especially pleasing when I work slowly in the field and care about deliberate composition.
Focus peaking and magnified live view have made manual work much easier on modern cameras. Beginners can start with autofocus to learn timing, then explore manual focus to refine technique.
- Consider your typical shoot: action needs AF; careful portrait or landscape work may suit manual focus.
- Think about build quality and feel — a well-made lens improves how you work.
- Check the affiliate links later in this guide for detailed comparisons of autofocus and manual focus options.
“Choose the system that supports your workflow, not the one that forces you to change it.”
| System | Strength | When to Use |
|---|---|---|
| Autofocus | Speed, tracking | Events, weddings, street |
| Manual focus | Control, tactile feel | Portraits, studio, landscape |
Top Picks for the Best 50mm Prime Lens with Autofocus
I tested several autofocus models to see which ones deliver strong sharpness wide open and pleasing bokeh.
Below I group options by price and intended use so you can match aperture, weight, and build to your shooting style.
Budget Friendly Options
Sony FE f/1.8 is a compact, affordable choice that many users carry daily. It gives solid sharpness and reliable autofocus for the price.
The f/1.8 aperture keeps weight low and still produces nice background separation for portraits and street images.
Professional G Master Series
Sony FE f/1.2 GM was updated in March 2025 and raises the bar for professionals. It offers outstanding sharpness, creamy bokeh, and top-tier build.
This model is a significant investment, but the performance and image quality often justify the money for studio and commercial work.
Third Party Alternatives
Third-party glass can be a smart compromise. The Sigma 50mm f/1.4 DG DN often performs much better than its price suggests.
It balances sharpness, build, and cost, giving users pro-level results without the highest price tag.
“I look for fast autofocus, consistent sharpness wide open, and a pleasing bokeh that helps your images.”
- Check sharpness tests and reviews before you buy.
- Use the links in this guide to compare price and exact specs.
- Decide whether weight and size fit your daily carry plan.
Exploring High Performance Manual Focus Options
Manual glass invites you to slow your pace and make each frame with intent. I find this approach sharpens my eye and improves composition.
The Joy of Mechanical Focus
A well-made focus ring delivers tactile feedback that focus-by-wire rarely matches. The precision helps especially when shooting portraits and landscapes where exact focus matters.
Shooting wide open at f/1.2 or f/1.4 gives unique bokeh and a characterful look many autofocus models don’t reproduce. I have reviewed several manual examples that pair lovely bokeh with excellent sharpness and contrast.
- The all-metal build often means lasting quality and steady weight in hand.
- Price varies widely, but many manual options give strong performance for the money.
- Mastering manual focus teaches depth of field control and how a glass renders images.
“A mechanical ring makes focus feel like part of the craft, not just a setting.”
| Feature | Strength | Ideal Use |
|---|---|---|
| Mechanical focus | Precise control | Portraits, studio |
| Wide open aperture | Characterful bokeh | Low light, creative work |
| All-metal build | Durability | Years of reliable use |
Why Sharpness Is Not the Only Metric for Success
Sharpness charts tell part of the story, but the emotion a piece of glass lends to an image matters to me just as much.
A technically perfect lens that is clinically sharp wide open can still leave photos feeling sterile. I look for contrast, color rendition, and how a tool handles flare when light hits the field of view.
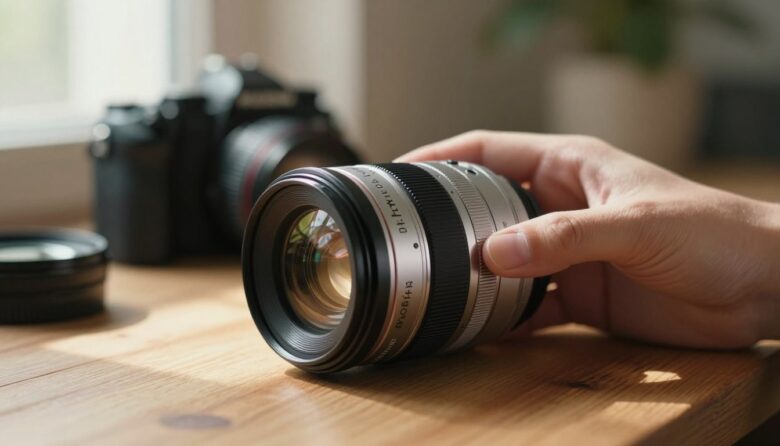
 positioned on a reflective surface, showcasing its intricate details and sharpness. The foreground highlights the lens with bright, natural lighting that emphasizes the glass quality and metallic details, while a bokeh effect softly blurs the background, hinting at a vibrant outdoor scene. The midground subtly features photographic elements like a crisp, out-of-focus backdrop of greenery, suggesting depth of field and the potential for beautiful imagery. The overall mood conveys a sense of professionalism and artistry, inviting photographers to reflect on the nuances of lens performance beyond sharpness.")
When I evaluate lenses I test for more than resolution. I watch how skin tones render, how backgrounds fall away at a wide aperture, and whether the focal length and aperture pair to support my vision.
“A lens with character often inspires more shooting than one with higher numbers.”
- Consider image quality in real scenes, not just 100% crops.
- Weigh performance traits like flare resistance and bokeh over raw sharpness.
- Use the affiliate links in this guide to see real-world comparisons.
| Metric | What I Check | Why It Matters |
|---|---|---|
| Sharpness | Center and corner | Useful, but not everything |
| Contrast & Color | Skin tones, saturation | Makes images feel cinematic |
| Flare & Bokeh | Sunlit scenes, backgrounds | Shapes mood and separation |
| Handling | Size, focus feel | Influences how often I shoot |
Navigating Lens Build Quality and Weather Sealing
A solid exterior and good seals change how confidently I shoot outdoors. When I know the build will hold up, I spend more time framing and less time worrying about dust or drizzle.
Weather sealing matters if you shoot in unpredictable conditions. Investing in well-made lenses protects electronics and glass from moisture, grit, and sudden weather changes.
Weather Sealing Benefits
I rely on weather-sealed gear for shoots that might push equipment limits. A sealed lens keeps the mount and internals safer, which helps maintain image quality and sharpness over time.
- Durability: Good build quality often adds weight, but it extends service life and preserves performance.
- Peace of mind: Models such as the Sigma 50mm f/1.4 DG DN Art show how modern construction can resist dust and moisture.
- Practical check: Always confirm the manufacturer’s specs for sealing and length/weight trade-offs before you buy.
“Protecting your gear with solid construction is a smart way to protect your investment.”
| Feature | Benefit | When it matters |
|---|---|---|
| Sealing | Reduced ingress of dust/moisture | Outdoor, travel, event work |
| Robust build | Long-term reliability | High-use professional shoots |
| Added weight | Better durability | Consider for handheld balance |
For deeper technical notes and affiliate links on sealed models and how they stand up in the field, check the related links later in this guide. Prioritizing build and sealing means your gear will keep delivering consistent performance. That reliability pays off when every shot counts.
Tips for Testing Your New Lens After Purchase
A quick round of tests at home reveals most focus or sharpness faults before field use.
Start simple: mount the lens on your camera and use a tripod. Shoot a focus chart or a high-contrast subject at several apertures to check for front or back focus.
Take images at wide open, then stop down two stops. Compare sharpness in the center and the corners. I do this to spot consistent issues early.
If you find problems, contact the retailer or manufacturer within the return period. Many stores honor returns for defective gear, so act quickly.
I also use a mix of real-world scenes: a portrait, a street frame, and a distant architectural shot. That shows how the lenses handle focus, bokeh, and overall image quality in practice.
- Use a tripod and focus chart for precise verification.
- Try multiple apertures to assess sharpness across stops.
- Check real scenes to confirm practical results.
- Refer to affiliate links for deeper review and testing procedures.
“Testing early gives you confidence that the price you paid matches the quality and results you expect.”
| Test | What to Look For | Action |
|---|---|---|
| Focus chart | Front/back focus | Recalibrate or return |
| Aperture series | Sharpness center vs corners | Note sweet spot stops |
| Real-world shots | Bokeh, color, flare | Decide usability for work |
Common Mistakes to Avoid When Buying Prime Lenses
Before you click buy, take a moment to match specs with how you actually shoot. I see photographers grab a model because the price looks tempting and then regret it.
One common error is choosing a lens only on price. A cheap option may save money at first but fail in sharpness or bokeh when it matters.
Check build quality and feel — a poorly built lens can sit unused after a few shoots. Size and weight matter, too. If a piece is heavy, you’ll leave it at home more days than you keep it on the camera.

Always confirm aperture specs like f/1.4 or f/1.2 and how they render in real shots. Read reviews, test images, and the affiliate links in this guide to avoid surprises.
- Do not buy by hype alone; compare sharpness and bokeh in real photos.
- Match length, size, and weight to your shooting style before you spend money.
- Remember that a good lens one loves to use often beats a costly option you avoid.
“Spend a bit of time on specs now and save yourself returns and frustration later.”
How to Adapt Legacy Lenses for Modern Cameras
A simple adapter often brings decades-old optical designs back into active use on modern mirrorless cameras.
Adaptation is affordable: many quality adapters cost under $50. I’ve used them to mount vintage glass and keep costs low while expanding my kit.
Vintage lenses can add character and unique rendering that modern pieces sometimes lack. I found some classics pair well with my Sony and give lovely f/1.4 rendering when shot wide open.
Expect to use manual focus. That requirement is a benefit: it improves technique and rewards patience. Modern cameras help with focus peaking and magnified view to nail sharpness.
Always confirm mount compatibility. A poor adapter can ruin infinity focus or let light leak. I include affiliate links later so you can pick proven adapters and check fit with your camera.
“Adapting vintage glass taught me to see light and edge detail differently.”
- Low cost to experiment
- Unique image character and bokeh
- Manual focus strengthens technique
| Item | Benefit | Note |
|---|---|---|
| Adapter ($20–$50) | Mounts vintage glass | Check mount match |
| Vintage lenses | Characterful rendering | Often strong at f/1.4 |
| Modern camera | Focus aids (peaking) | Helps manual focus |
Essential Accessories to Complement Your New Glass
Small additions to your kit often make the biggest difference in daily shooting.
Start with a quality hood and a protective filter.
A hood reduces glare and flare while guarding the front element from knocks. A screw-on filter adds a layer of protection without changing how your lens renders light.
Think about weight and size when you add gear. Bulky accessories can make your kit heavy and discourage shooting. I choose items that match the build quality of my camera and keep my bag balanced.
Carry a robust camera bag to organize and protect gear. I also pack a small cleaning kit; even a speck of dust can harm image quality.
- Protective hood and filter for flare control and safety.
- Light, durable bag to manage weight and storage.
- Cleaning supplies to keep glass pristine.
“Investing in the right accessories extends the life of your gear and keeps it performing at high quality.”
For specific picks, check the affiliate links in this guide to match accessories to your model and shooting style.
Conclusion
After testing many options, I stand by the idea that choosing a single, reliable focal length will change how you see the world and approach photography.
I hope this review helped you weigh value, cost, and size so you can pick a kit that fits your days and plans. Whether you favor an f/1.8 for compact carry or an f/1.4 for extra shallow depth, the point is to get out and shoot.
I spent many days testing these models to give clear notes and links to the gear mentioned. Take your time, follow the product links in the guide, and choose what keeps you shooting for years.
Thank you for reading — I look forward to seeing the images you make with your new piece of glass.
FAQ
What makes the 50mm “nifty fifty” a great first prime for a new photographer?
I recommend it because the standard focal length matches how we naturally see scenes. It’s versatile for portraits, street work, and low‑light shooting, and models like the Canon EF 50mm f/1.8 STM or the Nikon AF‑S 50mm f/1.8G give solid image quality at an affordable price. The compact size and light weight also make it easy to carry all day.
How does a standard focal length compare to wider and longer options?
A standard focal length delivers a natural perspective without the distortion of wide angles or the compression of telephotos. It’s a reliable middle ground for shooting people, everyday scenes, and product images, and it performs well wide open for shallow depth of field and pleasing bokeh when I need subject separation.
Which performance aspects should I prioritize when choosing my first fast lens?
I look at sharpness at usable apertures, autofocus reliability, and how the glass renders out‑of‑focus areas. Build quality and weight matter if I travel a lot, and I factor in flare resistance and contrast for backlit scenes. For value, compare costs against long‑term use—an f/1.4 model is faster but heavier and pricier than an f/1.8 option.
How do I pick the right option for portraits versus street photography?
For portraits I favor focal lengths that give pleasing compression and wide apertures like f/1.4 or f/1.8 for smooth bokeh. For street work I prefer a lighter, discreet model—something compact with quick AF and decent low‑light performance so I can move and react fast.
Is it better to spend more upfront or buy a cheaper option and upgrade later?
I usually advise balancing budget with expected use. Affordable options like the Canon EF 50mm f/1.8 offer excellent value for beginners. If you know you’ll shoot professionally or need top image quality, investing in a higher‑end f/1.4 or f/1.2 optic makes sense long term.
How important are size and weight when choosing this type of lens?
Very important for me. A compact, lightweight unit encourages more shooting time and less fatigue. Heavier fast‑aperture models can deliver unique rendering and low‑light gains, but I only choose them when the benefits outweigh the extra bulk for my work.
Which aperture should I choose for low‑light work and shallow depth of field?
I reach for the widest aperture available within my budget—f/1.4 and f/1.8 are great choices. f/1.2 gives even shallower depth of field and unique bokeh, but it’s heavier and more expensive. Consider how often you’ll need that extreme look before committing.
Should I get autofocus or learn to use manual focus lenses?
I prefer autofocus for fast, reliable results in most shooting situations. Manual focus options—like certain Zeiss or Voigtländer models—offer tactile control and can deliver stunning image quality, so they’re worth considering if I enjoy deliberate shooting and fine focus control.
What are solid autofocus picks for photographers on a budget?
I often suggest the Nikon AF‑S 50mm f/1.8G, Canon EF 50mm f/1.8 STM, and the Sony FE 50mm f/1.8 for their low cost, good sharpness, and effective AF. They give strong image quality for money and are easy to carry during long shoots.
Are there professional series options worth the extra cost?
Yes. Models like the Sony FE 50mm f/1.2 GM or Canon RF 50mm f/1.2L are engineered for top optical performance, durable build, and fast, accurate AF. They’re heavier and pricier, but for many pros the improved rendering and weather sealing justify the expense.
What third‑party alternatives should I consider?
I often recommend Sigma and Samyang (Rokinon) offerings. The Sigma 50mm Art line is known for excellent sharpness and build quality at a competitive price. Samyang makes lighter manual options that deliver attractive bokeh and solid value for photographers on a tighter budget.
Why choose a high‑performance manual focus option?
Manual focus optical designs from Zeiss, Voigtländer, and some Samyang glass provide unique character and mechanical precision. I enjoy the hands‑on approach: the focus throw and build quality make careful compositions satisfying, and the rendering can be distinct compared to modern autofocus optics.
Is sharpness the only thing that matters when judging image quality?
No. I value sharpness, but microcontrast, bokeh quality, color rendition, and flare control shape the final image. A slightly softer optic with beautiful out‑of‑focus rendering can produce more pleasing portraits than a clinically sharp lens with harsh bokeh.
How much does weather sealing and build quality matter?
It matters a lot if I shoot outdoors or travel in mixed conditions. Weather sealing adds reliability and longevity; pro‑grade glass from Canon, Nikon, and Sony often includes this. For studio or dry‑weather shooters, lighter, unsealed options can still be fine.
What should I test right after buying a new optic?
I check sharpness across apertures, autofocus accuracy, bokeh at wide apertures, and handling in typical shooting scenarios. Make sample portraits and low‑light shots, test for focus shift, and inspect for any mechanical issues. Calibrate or return within the seller’s window if something feels off.
What are common mistakes when buying a first fast lens?
I see people buy based on hype, ignore handling and weight, or choose the fastest aperture without considering real needs. Also, not testing on their camera body can lead to surprises—autofocus and image rendering can vary between systems.
Can I use older manual‑focus glass on modern cameras?
Yes. With the right adapter you can mount many legacy lenses from Canon FD, Minolta MD, and M42 mounts on mirrorless bodies. Autofocus won’t work, but adapters preserve aperture control on some lenses and give access to unique vintage rendering.
What accessories should I buy to get the most from new glass?
I always recommend a good lens hood to control flare, a lightweight tripod or monopod for stability, quality filters for protection, and a padded case for travel. A microfibre cloth and a focus calibration tool can also help maintain performance over time.

Noah Sterling is a prime lens photographer and visual storyteller dedicated to capturing sharp, intentional imagery through fixed focal lengths. He shares practical insights on composition, depth, and lens choice, helping photographers master simplicity and achieve powerful, professional results.