I believe that in today’s content world, the right gear makes fresh, professional video stand out. I focus on how a compact lens and your Sony camera work together to deliver clean image quality and believable footage.
Whether you are starting out or you’ve been shooting for years, understanding aperture, focal length, and sensor size matters. I will help you match each camera to the ideal glass so your clips stop a viewer’s scroll.
What Actually Changed My Results When I Simplified My Gear
I remember a phase where I kept chasing better lenses thinking they would instantly improve my videos, but the truth hit me after a few frustrating shoots. I had expensive gear, yet my footage still felt inconsistent because I wasn’t fully comfortable with what I was using. Once I switched to a simpler setup and focused on mastering one lens, everything became easier — framing, focus, and even storytelling felt more natural.
In my experience, consistency matters more than having the “best” equipment. A lightweight lens that I understood well gave me more reliable results than constantly switching between options. It also reduced setup time and helped me stay focused on what really matters: capturing a clean, stable, and watchable shot.
“The moment I stopped overthinking gear and started repeating the same setup, my videos finally looked more professional — not because of the lens, but because of how I used it.”
If I could give one practical piece of advice, it would be this: pick one focal length, test it in your real shooting conditions, and stick with it for a while. Pay attention to how it behaves with your arm length, lighting, and movement. That kind of hands-on testing will teach you far more than comparing specs online, and it helps you avoid buying gear that doesn’t actually fit your workflow.
My goal is to walk you through technical specs and real-world performance in plain language. Expect clear tips on angle, range, size, and how these choices shape your videos and overall content.
Key Takeaways
- Choosing the right lens boosts video image quality and viewer engagement.
- Sony offers compact options that pair well with many cameras and shooting styles.
- Aperture and focal length define depth, angle, and the look of your footage.
- Understand sensor size to pick the right length and size of glass.
- I’ll guide you from specs to hands-on results so your videos look professional.
Why Prime Lenses for Vlogging Are Essential
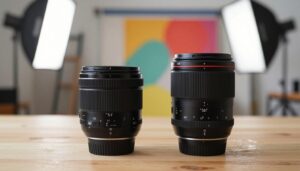
When I started filming myself, I discovered that typical photo gear rarely fit a creator’s needs. Photographers long relied on wide zoom ranges like 24-70mm. That focus left a gap for creators who need compact, easy-to-handle lens options.
Being in front of the camera changes your priorities. A heavy 24-70mm zoom setup feels unbalanced when you hold it or mount it on a small gimbal. I found that lightweight glass makes steady video work far easier.
Manufacturers slowly adapted as vlogging grew. Today many mirrorless cameras include video-first features. Still, the right lens choice depends on how you shoot.
- I often recommend a prime lens if your setup is static and you value simplicity.
- If you move a lot, a compact zoom gives framing flexibility on the go.
Understanding these things helps you match gear to your style. Whether you are a beauty vlogger at a desk or a traveler in motion, pick gear that supports the way you make videos.
Key Technical Considerations for Your Setup
Good stabilization turns shaky clips into watchable stories, and that starts with the gear you choose.
The Importance of Stabilization
I always emphasize stabilization as the top priority for vlogging. Handheld footage can distract viewers and lower perceived quality.
In-body image stabilization (IBIS) is a game-changer. It keeps video steady even when a lens lacks optical stabilization.
Check if your camera offers digital stabilization, but know it often adds a slight crop to your frame.
Balancing Your Gimbal
When you mount a lens and camera on a gimbal, balance matters. Motors strain if the kit is off, and smooth pans fail.
A zoom that shifts weight while zooming will undo balance. Test your setup and confirm autofocus and focus tracking work in real shooting conditions.
Sony’s Real-Time Tracking is reliable on many cameras and helps keep your face sharp during active takes.
Understanding Focal Length and Field of View
Focal length sets the visual distance between you and the viewer, and it directly affects how much of the scene appears in your video.
I recommend at least 24mm when you hold the camera at arm’s length. That length keeps your face and some background in frame without heavy distortion. If you have longer arms, a 28mm focal range can feel more natural.
Many vloggers pick 20mm to include more environment, but be careful. Going wider than 20mm can stretch facial features if the camera sits too close.
Using a gimbal or selfie stick gives you extra distance. That lets you use a tighter focal length while keeping a balanced view between you and the background.
| Use Case | Suggested Length (mm) | Field Impact | Notes |
|---|---|---|---|
| Handheld at arm’s length | 24–28 | Natural face and background | Good balance for single-camera vlogging |
| Wide background inclusion | 20 | Wider field, more scene | Watch distortion if too close to subject |
| Tighter framing with tools | 35+ | Tighter view, shallower scene | Use a gimbal or stick to add distance |
Remember: the sensor in your camera changes the effective field of view. A given focal range can look wider or tighter across different cameras.
I’ve found that knowing your arm length and testing a few focal ranges is the fastest way to pick a lens that matches your style.
The Role of Aperture in Cinematic Footage
A wide aperture is one of the quickest ways to give your videos a cinematic feel. It affects how much of the scene is sharp and how much melts into the background.
Achieving Shallow Depth of Field
I find that a fast aperture, such as f/2.8 or wider, is essential for that shallow depth you see in high-end footage. A fast lens blurs the background and keeps the viewer on the subject. This helps storytelling and makes the frame feel intentional.
Fast glass gives you control over light, so you can shoot in low light without over-raising ISO. That preserves image quality and reduces noise. It also changes the perceived angle and depth in a frame.
- Use a wide aperture to separate subject from background and create creamy bokeh.
- Stop down if you need more of the scene in focus or to avoid focus errors.
- Test f/2.8 on your camera to see how much depth field you get at typical shooting distances.

Managing Focus Breathing and Autofocus Performance
I test how a lens treats focus and framing before I recommend it. Focus breathing is when the edges of your frame appear to zoom as you change focus. That shift is subtle in handheld clips but obvious in planned B-roll or cinematic takes.
Autofocus must be rock solid. I prefer glass that pairs well with Sony’s face and eye detection. When eyes stay sharp in tough lighting or quick motion, the video reads as professional.
Modern motors give precise control and fewer distracting jumps. That keeps the background steady while you move. Good control also reduces the need to correct clips in post.
| Issue | Impact on Footage | What I Look For |
|---|---|---|
| Focus breathing | Frame scale shifts during focus pulls | Minimal internal lens movement |
| Autofocus lag | Hunting or missed eye focus | Fast, accurate motors and Sony compatibility |
| Harsh focus shifts | Distracting background jumps | Smooth drive system and focus control |
To keep your image crisp, set focus mode to continuous when moving. Use face/eye priority when available. Test a lens in your shooting conditions before buying.
- Minimize breathing if you shoot cinematic B-roll.
- Prioritize autofocus performance for talking-head video.
- Adjust aperture to help AF lock on the eyes in low light.
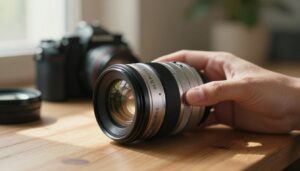
Weight and Balance for Handheld Content Creation
Holding gear all day shapes which glass I choose more than any spec sheet. I prioritize a lightweight lens because I often hold the camera at arm’s length. That reduces fatigue and keeps my video steady.

When I use a gimbal, balance matters even more. A kit that shifts weight while you zoom makes motors work harder. I look for a lens that keeps its center of gravity stable so pans stay smooth.
Travel shoots demand a compact setup. I carry small gear to move quickly and capture spontaneous footage without a heavy bag. Benj Haisch’s use of the Sony 24mm f/2.8 G is a great example of that approach.
- Light weight: lets you film longer without shaky clips.
- Balanced zoom: keeps gimbal motors relaxed and the scene stable.
- Proper size: supports steady framing and reliable focus on the move.
Managing Sensor Size and Crop Factors
Sensor size changes how a lens behaves and shapes the final video image. A full-frame camera usually gives the best low light performance and the strongest background blur. That larger sensor also helps keep depth and image quality high.
When I use APS-C or Micro Four Thirds bodies, I always factor in the crop. The crop factor effectively changes the focal length, so a 24mm on a smaller sensor will look tighter. Micro Four Thirds cameras multiply that effect more than APS-C.
Digital stabilization can add another crop on top of that. I often start with a wider lens so stabilization and any 4K 60p crop don’t steal my field of view. A lens that offers an f/2.8 aperture is helpful on smaller sensors to match depth of field seen on full-frame.
To avoid buying a lens that ends up too tight, calculate the total crop factor (sensor × stabilization × recording mode). That simple math saved me from several bad purchases and kept my framing consistent across cameras.
- Tip: Test a lens on your camera and in 4K 60p to confirm the final frame.
- Tip: Use slightly wider focal lengths when you rely on digital stabilization.
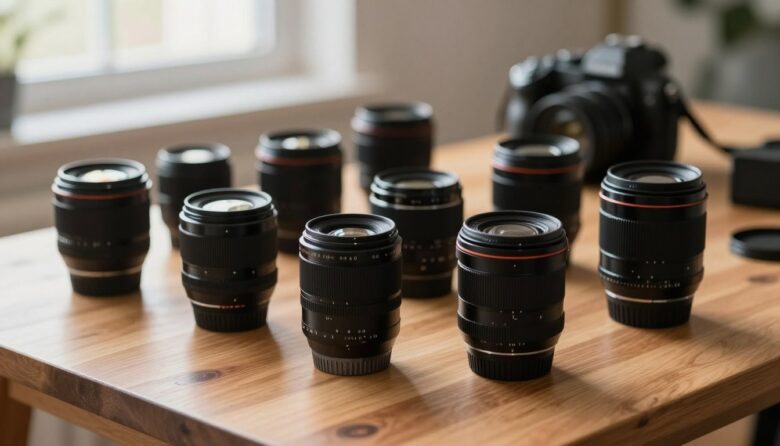
Top Prime Lenses for Vlogging
I choose lenses that match how I move, talk, and edit my videos. Below are compact options I rely on when I need reliable framing, fast aperture control, and strong autofocus.
Ultra Wide Options for Selfie Style
Sony 11mm f/1.8 gives an ultra-wide view and pleasing background bokeh. Faruk Korkmaz uses it to stay in frame without filling the shot.
The Sony 15mm f/1.4 G is great on APS-C bodies. Jason Frankle used it for creative timelapse content and shallow depth with easy control.
Versatile Mid Range Primes
The Sony 24mm f/2.8 G is tiny and handy in my travel kit. Benj Haisch includes it in an ultra-compact setup because it establishes the scene fast.
The 35mm and 40mm options sit well between wide and tight framing. They offer balanced focus and a natural view for talking-head video.
High Performance G Master Choices
Sony 14mm f/1.8 G Master and the Sony 24mm f/1.4 G Master deliver sharp footage and pro-level control. Will Godward and Elina Osborne used them to capture clean, low-light clips.
| Use | Model | Aperture | Strength |
|---|---|---|---|
| Selfie wide | Sony 11mm f/1.8 | f/1.8 | Wide field, nice bokeh |
| APS-C creative | Sony 15mm f/1.4 G | f/1.4 | Sharp, lightweight |
| Travel walkaround | Sony 24mm f/2.8 G | f/2.8 | Compact, reliable |
| Pro wide | Sony 14mm f/1.8 GM | f/1.8 | Top sharpness, low-light |
Essential Accessories to Polish Your Videos
A few smart accessories make daily shooting easier and make footage look cleaner. I focus on tools that give the biggest return on time and money.
Audio first: I believe quality sound matters most. A RØDE VideoMicro sits on my kit and instantly beats the in-camera mic for clarity and presence.
Reliable media: I carry SanDisk or Lexar cards to avoid dropped takes. They offer decent capacity and steady write speeds for high-definition video.
Tripods shape your framing. A mini-tripod is ideal for desk work. A pro tripod opens creative overhead and low-angle shots that make your content stand out.
- Use LED softboxes to control soft, consistent light and lift skin tones.
- Build a kit around your shooting needs rather than chasing trends.
- Remember natural window light — it’s free and often the best way to set a mood.
Final tip: choose accessories that solve real problems. One good mic, a couple of reliable cards, and stable support will improve your footage more than a shelf of unused gear.
Common Pitfalls to Avoid When Buying
Buying the wrong lens can turn a fun shoot into a daily struggle with weight, balance, and focus problems. I see creators pick heavy glass that makes handheld work tiring and unstable.
Avoid large, poorly balanced gear. Mid-range zooms like the 24-70mm are often too heavy and not wide enough for active vlogging. They also shift weight and ruin gimbal balance.
Mind your camera’s crop factor. An APS-C or mirrorless body can make a 24mm feel much tighter. That changes your field of view, depth, and framing in real conditions.
Pick an aperture that matches your needs. I recommend f/2.8 or faster on smaller sensors to keep background separation and good low-light image quality.
- Consider the Tamron 11-20mm f/2.8 for APS-C crop bodies and the Tamron 17-28mm f/2.8 as a versatile option for both APS-C and full-frame.
- Check focus breathing and autofocus compatibility with your camera before buying.
- Don’t let price be the only guide — test weight, control, and real-world performance first.
Conclusion
,Choosing gear should start with how you tell a story, not with specs on a shelf.
I recommend matching a lens to your shooting style and your mirrorless cameras. That decision affects weight, balance, and how you move while vlogging.
I highlighted options from the versatile Tamron zoom to high-performance Sony G Master lenses. Pay attention to aperture and focal length when you test them.
Sensor crop, range and length change the final image and overall quality. Add a good mic and steady support to raise production without extra complexity.
Experiment until you find the balance of weight, performance, and framing that fits your process. The best choice is the lens that keeps your creativity front and center and makes your video feel like you.
FAQ
Which compact prime offers the best low-light performance for handheld vlogs?
I recommend choosing a fast f/1.8 or wider option from Canon, Sony, or Sigma if you shoot in mixed lighting. Those apertures let in more light and create a shallow depth of field, so your subject stands out without cranking ISO. Stay mindful of sensor size and crop factor—APS-C and Micro Four Thirds will affect effective field of view and light gathering.
How do I balance a gimbal when using a heavier lens?
I level the camera on the gimbal, then mount the lens and adjust the sliding plates and motor strength. Move the camera forward/back and side-to-side until it holds level with motors off, then fine-tune motor settings. Using a lighter lens or a small follow-focus unit helps keep balance and extends motor life.
Is autofocus reliable on mirrorless bodies during run-and-gun shooting?
Modern mirrorless systems from Sony, Canon, and Panasonic offer highly capable eye and face detection that work well for vlogging. I still prefer manual focus or a single reliable AF mode for predictable pulls; continuous AF can hunt in low contrast or extreme low light, so test your combo before an important shoot.
What focal length should I pick for selfie-style framing?
I usually choose ultra-wide to wide options around 14–24mm on full-frame or the equivalent on crop sensors. Those give a flattering, inclusive frame when held at arm’s length. Avoid extreme wide angles that distort faces; a moderate wide keeps the background visible and subjects natural looking.
How much does focus breathing matter for video?
Focus breathing can make a visible shift in framing during focus pulls. For talking-head content it’s less critical, but for cinematic shots and rack focus I prioritize lenses with minimal breathing. Cinema-oriented designs and higher-end glass generally control breathing better.
Should I pick a zoom or a fixed focal length for my main setup?
I prefer a fixed focal length when I want the best image quality, size, and low-light performance. Zooms add versatility but often trade off maximum aperture and compactness. If you need flexibility on location, a high-quality zoom like a 24–70mm f/2.8 is a strong option.
How do sensor size and crop factor change my lens choice?
Crop sensors multiply effective focal length—APS-C typically by ~1.5x and Micro Four Thirds by ~2x—so consider the equivalent field of view when choosing glass. I match lens focal lengths to the sensor to keep my desired framing and ensure wide angles remain wide enough for selfie or vlogging shots.
What accessories should I prioritize to improve video quality?
I invest in a compact tripod or gimbal, an external microphone, and ND filters for outdoor control. A small LED light and spare batteries help extend shoots. Good accessories stabilize footage, polish audio, and let me expose smoothly in bright conditions.
How important is lens weight and balance for handheld work?
Extremely important. Heavy glass causes fatigue and makes steady handheld moves harder. I opt for lightweight, well-built lenses or use support like a gimbal. Good balance reduces shake and lets me keep consistent framing during long takes.
What aperture should I use to get cinematic background blur without losing focus on the subject?
I often shoot between f/1.8 and f/2.8 for a pleasing blur while keeping enough depth of field for moving subjects. Wider apertures give stronger separation but demand precise focus. If I expect motion, I stop down slightly to f/2.8–f/4 for more forgiving focus.

Noah Sterling is a prime lens photographer and visual storyteller dedicated to capturing sharp, intentional imagery through fixed focal lengths. He shares practical insights on composition, depth, and lens choice, helping photographers master simplicity and achieve powerful, professional results.