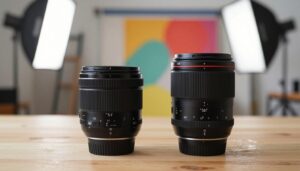
I have spent 19 years in the photography world, testing gear and refining my eye for what delivers repeatable, high-end results. Choosing the best portrait prime lenses can feel like a gamble, but I’ll share what works for studio and on-location shoots in the United States.
What Took Me Years to Understand About Choosing the Right Portrait Lens
After working with different portrait lenses over time, I realized that the biggest mistake I made early on was assuming that a more expensive lens would automatically improve my photos. I tested several options in real shoots, and in many cases, the difference wasn’t as dramatic as I expected. What actually made a visible impact was how comfortable I was with the focal length and how well it fit my shooting style.
In practice, the best results came when I stopped chasing specs and focused on consistency. Using the same lens repeatedly helped me understand how it handles light, distance, and subject interaction. That familiarity made sessions smoother and reduced the need for heavy corrections in post-production.
“The lens matters, but knowing exactly how it behaves in your hands matters much more than any technical advantage on paper.”
If you’re deciding which lens to invest in, my advice is simple: rent or test it in a real session before buying, and pay attention to how it feels during the shoot. Notice your working distance, how your subject reacts, and how easily you can maintain focus and composition. Those practical details will tell you far more than reviews, and they help you avoid spending on gear that doesn’t actually improve your workflow.
Whether you shoot in Bristol or a city studio, the question I hear most is which lens will give you better separation, sharpness, and skin tone. I tested a lot of cameras and optics so you don’t have to guess.
This guide walks through practical picks and real-world use, helping you choose one lens that fits your shooting style. I aim to make your decision clear and confident, with advice rooted in years of hands-on experience.
Key Takeaways
- I bring 19 years of pro experience to help narrow your options.
- Real tests cover studio and location work for reliable results.
- Find gear that gives clean separation and true skin tones.
- I focus on practical advice for cameras and lenses portrait work.
- This guide aims to make choosing equipment an easy decision.
Understanding the Importance of Portrait Optics
Over nearly two decades behind the camera, I learned how optical choices shape every image. The glass you pick sets the tone, sharpness, and mood for a session.
Choosing the right lens can turn a simple shoot into something editorial and memorable.
Investing in quality lenses is an investment in your visual language. Good optics deliver cleaner separation, truer skin tones, and faster workflows in both studio and on location work.
Many photographers underestimate how specific lenses portrait photography choices influence the final aesthetic. Each session brings different needs, and the right gear keeps you prepared for creative shifts.
“The lens often decides whether a frame reads casual or cinematic.”
- Optics control depth, contrast, and character.
- Quality glass saves time in retouching and color grading.
- Choosing glass is part of developing a signature style.
| Characteristic | Impact | When to Prioritize |
|---|---|---|
| Sharpness | Defines facial detail and texture | Studio editorial work |
| Bokeh | Separates subject from background | Headshots and creative portraits |
| Color rendering | Influences skin tone accuracy | Commercial and client work |
| Size & weight | Affects mobility and comfort | On-location shoots |
The Versatility of the Standard Prime
A standard 50mm can quietly do a lot of heavy lifting in a session, letting me move between styles without swapping glass. I often rely on this choice when I want a natural perspective that keeps a subject honest and the frame balanced.
Natural Perspective
The 50mm focal length captures faces and bodies without noticeable distortion. When I photographed Katie Elliott for her Little Challenges podcast with a Canon 50mm f1.2, the body and shoulders felt true to life. That calm, realistic look makes editing easier and keeps skin tones believable.
Environmental Versatility
With a 50mm I can include a bit of the environment to add context while still holding a soft background. A consistent aperture helps me keep the subject sharp and the depth field controlled. This makes it simple to switch from a tighter shot to a wider frame quickly.
“The 50mm keeps the scene honest and lets the story breathe.”
- Natural perspective with low distortion.
- Good in tight spaces and small studios.
- Easy to balance subject and environment.
Why the Portrait King Remains Essential
When I reach for a go-to portrait lens, the 85mm keeps earning its place in my bag.
I shot a series of editorial frames of Lady Nade in Bristol with a Canon 85mm f/1.2. The combination of focal length and wide aperture gave a polished look that felt professional and immediate.
The 85mm length compresses features in a flattering way. That compression pulls the background forward just enough to read, while the subject stays sharp.
“The 85mm created a smooth bokeh that made Lady Nade’s portraits sing.”
I have spent a lot of time with this portrait lens. It calms nervous clients because I can get close without crowding them. The balance between subject and background is what makes this one tool so useful in portrait photography.
| Characteristic | Effect | Use Case |
|---|---|---|
| 85mm focal length | Flattering compression | Headshots, editorial |
| Wide aperture (f/1.2) | Shallow depth, creamy bokeh | Low light, subject isolation |
| Working distance | Comfortable for subjects | Nervous clients, candid shots |
- One go-to lens can define a session.
- It delivers the classic look with minimal fuss.
Capturing Context with Wide Angle Primes
I often choose a wider focal length when the goal is to show a person and the space that shapes them. A wider lens helps me place a subject inside a story instead of cutting them free from it.
On a recent shoot at Who Cult Donuts I used the Sigma Art 35mm f/1.4. The glass let me include the creative clutter and unusual lighting while keeping the main figure sharp. That mix of studio detail and human presence made the frames feel lived-in.
Storytelling Through Environment
Manage your aperture and depth field so the subject reads clearly while the room adds context. A bit of background texture tells the viewer where the person works and why it matters.
- 35mm captures the subject with their workspace for richer shots.
- Good wide-angle glass handles complex light and preserves image quality.
- Use shallow depth to isolate the person while leaving context visible.
“A wider lens lets the setting speak as loudly as the face.”
Telephoto Options for Professional Results
Telephoto glass changes how faces sit in a frame and how backgrounds compress into a cinematic sweep. I rely on reach when I want clean separation and a controlled depth field without crowding the subject.
Compression Benefits
The Canon 70-200mm f/2.8 has been a staple in my kit for 19 years. Its focal length gives flattering compression that tightens features and smooths backgrounds.
This compression makes skin tones read truer and keeps image quality high for commercial work like my Parkinson’s Magazine shoot.
Working in Tight Spaces
Zoom capability lets you frame people perfectly without moving furniture or needing a huge studio. The 70-200mm focal length is ideal for headshots and small groups.
Stabilization Advantages
Modern cameras and stabilized zooms let me shoot at slower shutter speeds. I commonly drop to around 1/125 second when stabilization is active.
That extra time helps in low light and when a natural blur adds mood to the frame.
“A stabilized telephoto gives you reach and steadiness at the same time.”
- The 70-200mm zoom delivers consistent compression and sharpness.
- It isolates the subject while keeping a shallow depth field.
- Image stabilization expands shooting options in low light.
| Feature | Benefit | Use |
|---|---|---|
| 70–200mm range | Flattering compression | Headshots, editorial |
| Zoom flexibility | Framing without large spaces | Corporate sessions |
| Stabilization | Slower shutter speeds | Low light, handheld |
Exploring Macro Lenses for Unique Portraits
A macro optic can give portraits a fresh, intimate look that differs from standard choices. I often reach for the Canon 100mm f/2.8 Macro when I want surgical detail and smooth rendering of skin.
Achieving Creamy Bokeh
The 100mm’s focal length lets me move a bit closer to a subject than with a typical telephoto. This shorter working distance helps me craft frames that feel personal without distortion.
The aperture on this lens delivers a creamy bokeh that isolates the subject. I used it to shoot actor Nik Howden, and the results were crisp and professional.
“Macro glass adds a layer of precision and a soft fall-off that I love for headshots.”
| Feature | Effect | When to Use |
|---|---|---|
| 100mm focal length | Close framing with flattering compression | Headshots, editorial close-ups |
| f/2.8 aperture | Shallow depth, smooth bokeh | Low light, subject isolation |
| Macro capability | High sharpness at close range | Detail work and creative portraits |
I keep this lens in my bag because it handles both macro work and high-end portrait sessions. It proves that a macro tool can be a versatile portrait lens for many results.
Evaluating the Best Portrait Prime Lenses for Your Kit
A smart gear choice balances weight, aperture, and the look you want in the frame. I start by thinking about how a lens will sit on my camera and in my hands all day.
Consider weight: the Sony FE 85mm 1.4 GM II is 640g, which feels light on modern mirrorless cameras. That single spec can change whether you carry a second body or skip it.
- Range and focal length: decide if a fixed focal length or zoom suits your sessions.
- Aperture choice: f/1.2 versus f/1.4 often comes down to budget and desired background blur.
- Image quality: look for sharpness, color rendering, and how a lens renders skin in the frame.
I recommend testing several lenses portrait options before committing. Try different focal lengths on real clients and note how each affects workflow and comfort.
“Investing in the right glass will lift your photography and make client results predictable.”
| Factor | Why it matters | Quick tip |
|---|---|---|
| Weight | Comfort and mobility | Sample on your body |
| Aperture | Background separation | Match to style |
| Quality | Final image look | Prioritize sharpness |
The Role of Aperture in Background Blur
Controlling aperture lets me sculpt the space behind a subject with intent.
I use a wide aperture to push distracting elements out of view. At f/1.4 the plane of focus is very thin, which creates a pleasing separation between subject and background.
Achieving Creamy Bokeh
A clean bokeh starts with glass that handles out-of-focus light well. The Sony FE 85mm 1.4 GM, for example, includes XA elements that reduce onion-ring artifacts and keep the bokeh smooth.
When I shoot wide I notice how a quality lens changes the look of the image. Soft, even circles of light are less distracting and let the subject read clearly.
- The aperture is the most critical control for background blur.
- High optical quality reduces distracting shapes in the bokeh.
- A precise setting gives a true shallow depth field to isolate the subject.
“I always test apertures on real subjects to find the balance between subject sharpness and background melt.”
| Setting | Effect | When to Use |
|---|---|---|
| f/1.4 | Maximum background separation, creamy bokeh | Headshots, low light |
| f/2.8 | Controlled blur, more subject detail | Half-body shots, small groups |
| f/5.6 | Greater scene detail, reduced bokeh | Environmental portraits |
Balancing Image Quality and Portability
A compact setup often matters more than a headline spec when I shoot on location. The 853g Tamron 70-180mm 2.8 G2 zoom proves that you can carry a light tool without losing professional image quality.
I value a lens that gives a consistent depth field across the whole frame, even wide open at a large aperture. That consistency saves time in-camera and in post.
When I travel, having a zoom that fits in my bag is a real advantage. A bit of versatility from a compact zoom often matches what I need from single focal options.
Focal length controls how much background you include, which in turn affects how easy it is to keep a shallow depth field. Modern cameras let smaller gear deliver very high image quality while keeping my shoulders and workflow happy.
“A lighter rig keeps me moving and lets me focus on composition, not fatigue.”
- Weight vs quality: 853g is an easy trade-off for pro results.
- Versatility: zooms can cover many framing needs on one shoot.
- Consistency: reliable depth across the frame matters most.

| Spec | Why it matters | When to choose |
|---|---|---|
| Weight (853g) | Comfort and mobility | Travel and long sessions |
| Zoom range | Framing without swaps | Mixed headshots and half-body |
| Aperture | Shallow depth field control | Low light and subject isolation |
Adapting Legacy Glass for Modern Bodies
Adapting vintage glass can instantly change the mood of a digital frame.
I often mount the Canon FD 85mm 1.2 Aspherical on modern mirrorless cameras to get a distinct, film-like look.
These older lens designs add character that is hard to replicate with current optics. Shooting wide at around f/1.4 gives a soft fall-off and pleasing imperfection.
Adapting a classic lens is budget-friendly and practical. You keep the original focal length and manual aperture control, but you gain modern autofocus bodies and higher ISO performance.
“Some of my most memorable sessions came from a single adapted lens that gave the work a timeless feel.”
- Check mount compatibility and mechanical aperture control before you buy.
- Expect a learning curve; manual focus rewards patience.
- Use adapters that maintain correct flange distance for accurate focus.
In short, a well-adapted legacy lens can be an economical way to add a specialized portrait lens to your kit and to craft frames with unique personality.
Essential Tips for Professional Portrait Sessions
A few minutes spent on comfort and lighting pays back in consistent, usable images. I focus on how light interacts with skin and background before I dial in any settings on my cameras.
Lighting Techniques
I use simple modifiers first: a softbox or a reflector to shape light. Small moves—raising the key light or opening a reflector—change contrast and skin tone a lot.
Use lighting to control depth field visually: push highlights and shadow so the subject reads sharp while the background melts into a pleasing blur.
Subject Comfort
I spend time talking with people before I shoot. A relaxed subject gives natural expressions and makes post work easier.
Match your aperture and lens choice to the look you want, but never rush the person. Give time for small adjustments in pose and light.
- Good lighting equals better image quality in-camera.
- Comfort yields natural expressions every session.
- Adjust lighting to suit each subject, not the other way around.
“Professional photography is as much about people as it is about gear.”
Budget Considerations for Growing Photographers
When funds are tight, smart gear choices let you grow without compromising the final frame.
I recommend the Sirui 85mm f/1.4 Aurora as a strong, affordable option. For roughly $499 you get a compact portrait lens that produces pleasing separation and sharpness. That price makes it a sensible first upgrade for many shooters in the United States.
Don’t assume you must spend a fortune on prime lenses. Consider focal length, aperture, and the minimum focus distance to make sure a lens suits your workflow. A short working distance can change how you compose headshots and half-body frames, so check that spec before you buy.
Sometimes a single versatile zoom lenses option beats buying several fixed focal tools when you start. A quality zoom helps you cover different lengths in one package and reduces the weight you carry between jobs.
- Sirui 85mm 1.4 Aurora — ~ $499, solid value.
- Check minimum focus distance to match your shooting distance.
- Plan a long-term upgrade to an f/1.2 or higher-grade f/1.4 when budget allows.
| Choice | Why it matters | When to pick |
|---|---|---|
| Affordable lens | Good image, low cost | Building a kit |
| Zoom | Versatility across lengths | Event or mixed work |
| High-end f/1.2 | Maximum background separation | Long-term goal |
“Start with reliable, affordable glass and upgrade to an f/1.2 or pro f/1.4 when your business needs it.”

Conclusion
I choose gear that helps me tell a story and keeps the person in front of the camera the focus. That approach makes technical details like aperture and bokeh tools, not the goal.
Choosing the right lenses or a useful zoom is a personal journey. Think about how each choice affects image quality and how you work with a subject.
Whether you use modern cameras or adapted glass, the real win is a repeatable way to get consistent results. Practice with aperture settings and framing until the look feels like yours.
If you have questions about lenses portrait gear or want to share a shoot, I’m happy to help. Your experience matters more than a single technical spec.
FAQ
What focal lengths do I usually reach for when shooting head-and-shoulders images?
I tend to use focal lengths between 85mm and 135mm on full-frame cameras for tight head-and-shoulders shots. That range gives me a natural, flattering perspective and pleasing subject-to-background separation without distortion. On APS-C bodies I often choose 50mm to 85mm to achieve a similar look.
How much does aperture matter for separating my subject from the background?
Aperture is critical. Wider apertures like f/1.2 to f/1.8 give me a very shallow depth of field and strong background blur, which helps isolate the subject. I also pay attention to subject distance and background distance, since those two factors affect the amount of blur as much as the f-stop.
Should I prefer a short telephoto or a standard focal length for full-body environmental shots?
For full-body images that include environment, I often pick a standard focal length around 35mm to 50mm. It preserves context and avoids the compression of longer glass. If I want a more compressed look while keeping subject separation, I switch to a short telephoto like 85mm.
Can I use macro optics for close-up portraits or detail shots?
Yes. Macro lenses let me capture fine facial details, eyes, and textures with excellent sharpness and a smooth out-of-focus background. They also give creative options for abstract or editorial portraits when I want extreme close-ups.
How do telephoto lenses change the look of my images compared to wider options?
Telephoto glass compresses the scene, making background elements appear closer and larger relative to the subject. I use that compression to create a layered, cinematic feel and to isolate subjects from busy backgrounds. Telephotos also allow comfortable working distances, which helps with candid moments.
Is image stabilization important for portrait work?
Stabilization helps when I shoot handheld at slower shutter speeds or in low light, especially with longer focal lengths. I still prioritize a fast shutter for sharp eyes, but stabilization gives me extra flexibility and reduces discarded frames from camera shake.
How do I adapt older manual-focus glass to modern mirrorless cameras?
I use a simple mount adapter designed for the lens and camera combination. Many legacy lenses deliver unique rendering and chromatic character. I pay attention to flange distance, and I prefer adapters with a solid mechanical fit and, when available, an aperture control ring or clickless option for easier exposure control.
What role does lighting play when using fast optics for shallow depth of field?
Lighting is everything. With wide apertures I still need to place light carefully to preserve catchlights and model skin tones. I balance natural and artificial sources to control contrast and highlight separation, which complements the shallow depth of field and keeps the subject engaging.
How do I choose between sharpness and character when selecting glass?
I decide based on the project. For commercial headshots I favor clinical sharpness and consistent bokeh. For editorial or creative portraiture I sometimes pick a lens with unique microcontrast or swirl. It’s about matching the optical signature to the mood I want to create.
Are there practical tips for working in tight spaces with longer focal lengths?
In confined areas I often switch to a shorter focal length to avoid backing up into walls. If I must use a longer lens, I position the subject farther from the background to get separation, and I use off-camera lighting to control highlights and shadows without moving the camera too much.
What compromises should I consider between image quality and portability?
Larger, faster glass usually delivers superior sharpness and wider apertures but adds weight. I balance that by carrying one fast short telephoto and one compact standard lens when I need mobility. That way I maintain image quality for people shots while keeping my kit light enough for long sessions.
How do aperture, subject distance, and sensor size interact to affect depth of field?
All three matter. Wider apertures and closer subject distance reduce depth of field. Larger sensors make it easier to achieve shallow focus for the same field of view. I experiment with distance and aperture together to craft the desired plane of focus and background blur.
Can zoom lenses replace fixed focal-length options for professional sessions?
Zooms offer flexibility, and modern zooms can be very sharp. I still prefer fixed focal lengths for their compact size, wider maximum apertures, and often superior rendering. That said, a high-quality zoom is a practical choice for run-and-gun assignments where changing glass frequently slows me down.
What budget-friendly strategies help growing photographers upgrade their kit?
I recommend buying one versatile fast lens that covers typical assignments—an 85mm or 50mm equivalent—and adding a short telephoto later. Buying used from reputable dealers and considering third-party brands like Sigma or Tamron can stretch your budget while improving image quality.

Noah Sterling is a prime lens photographer and visual storyteller dedicated to capturing sharp, intentional imagery through fixed focal lengths. He shares practical insights on composition, depth, and lens choice, helping photographers master simplicity and achieve powerful, professional results.